The following instructions describe how to replace brake pads on most popular vehicles. Be sure to read them completely before you begin.
Changing a vehicle’s brake pads is a very common DIY project. Checking your brake pads should be part of your regular maintenance checklist. If you follow the right instructions and follow a few safety guidelines, changing them can be straightforward.
Would you rather leave the work to a pro? No problem! One of our NAPA AUTOPRO service centres can help.
NOTE: Most vehicles are equipped with an ABS (Anti-Lock Braking System), a computer-controlled system that uses additional mechanical and electrical parts to prevent the wheels from locking up during braking. It may be necessary to temporarily disconnect or remove some of the ABS parts to replace the brake pads. Consult an appropriate service manual to be sure that all brake parts have been properly reinstalled and reconnected.
- Difficulty: Medium
- Duration: 1-2 hours
- How often: depending on brake wear
TOOLS AND EQUIPMENT
To replace your disc brake pads, you’ll need:
BEFORE YOU BEGIN
Pick up the correct high-quality brake pads and hardware for your vehicle from your local NAPA Auto Parts store or find them on our website. You should also pick up some high-temperature brake lubricant for your brake caliper sliders and pad ears to ensure good lubrication and help prevent squealing.
Gather all the tools and equipment you’ll need and choose a solid, level surface to work on.
CAUTION: Brake lining may contain asbestos. Avoid creating or breathing dust when changing linings or cleaning parts.
Check for leaks and replace seals or calipers/master cylinder lines/valves as needed.
Work on one wheel at a time, leaving the other side as a reference.
INSTALLATION
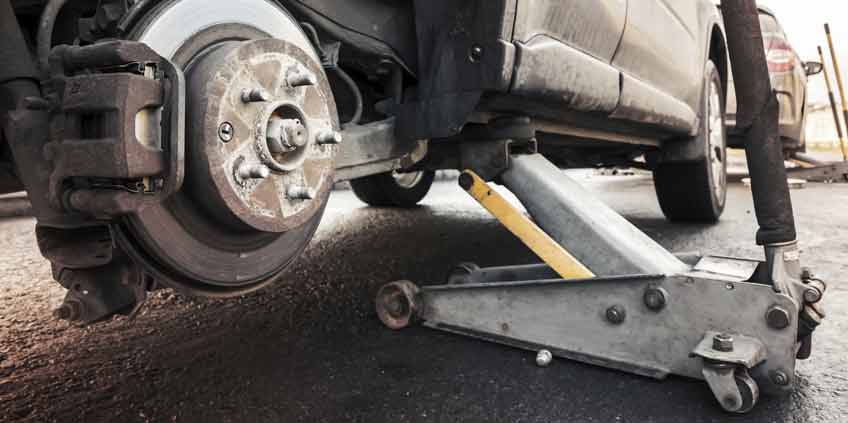
JACK UP THE CAR
Bumper, scissor, or hydraulic jacks can be used to raise the vehicle, but you should never attempt to work under a vehicle supported only by a jack. The vehicle should be supported by jack stands rated for at least the weight of the vehicle (check the owner’s manual for the correct jack points). You should also use wheel chocks to stop the vehicle from rolling. Do not jack up the vehicle on a hill, as it could fall from the jack.
Remove approximately half of the brake fluid from the reservoir, pour it into a container, and dispose of it properly. Do not reuse it. Always refill with fresh brake fluid from a clean, sealed container. Brake fluid will dissolve paint, so handle with care.
Loosen the lug nuts on the wheels you’ll be servicing. Unless you have an impact wrench, this is easier on the ground.
Jack up the wheel or axle you’ll be working on, support it securely with jack stands, and block the other wheels.
Remove the lug nuts and the wheel.
REMOVE THE BRAKE CALIPERS
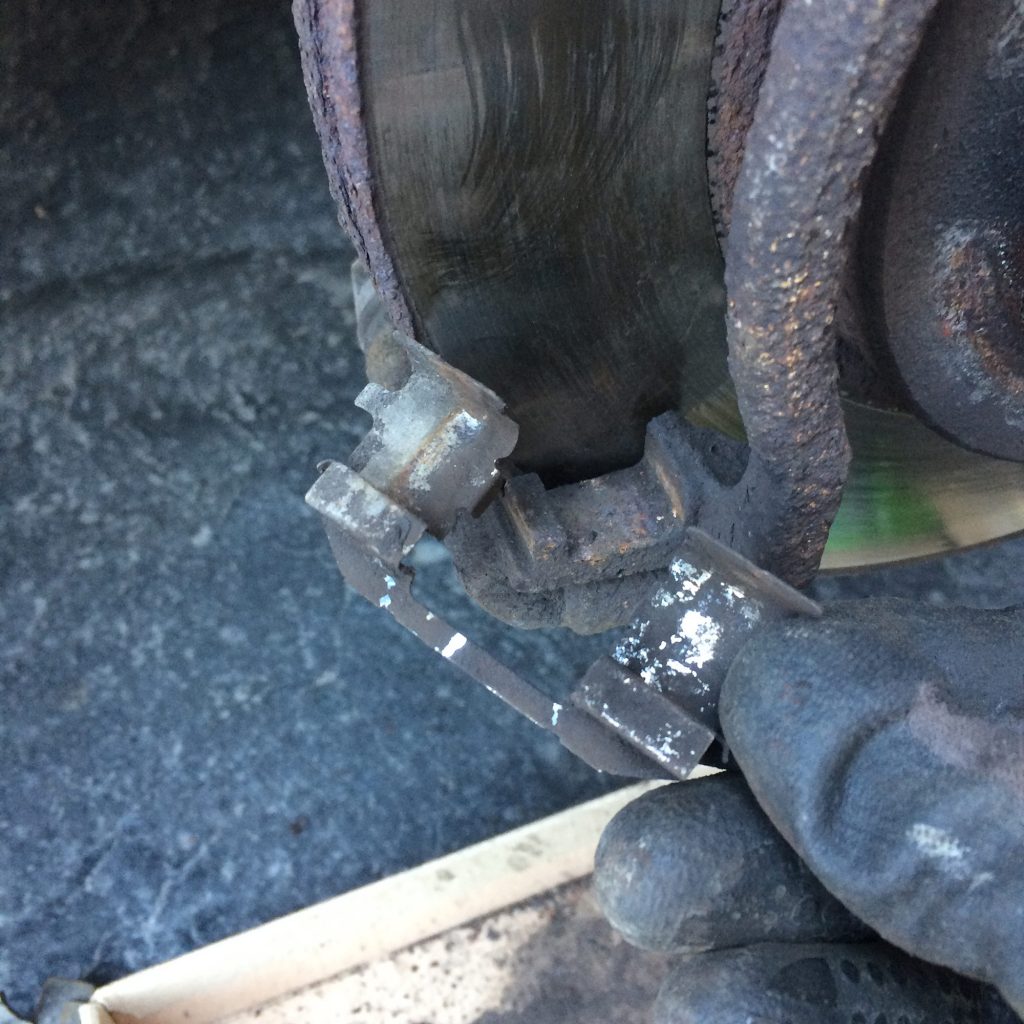
- Look for any exterior-mounted pad retaining springs. Remove these carefully, as they’re under high tension. Set aside for cleaning and reinstallation.
- NOTE: Some modern vehicles have electronic parking brakes on the rear axle. With these systems, a motor mounted to the caliper controls the parking brake. These systems may require a special computerized tool to retract. Others can be retracted by removing the parking brake motor.
- If yours need a computer, one of our NAPA AUTOPRO service centres can service your brakes.
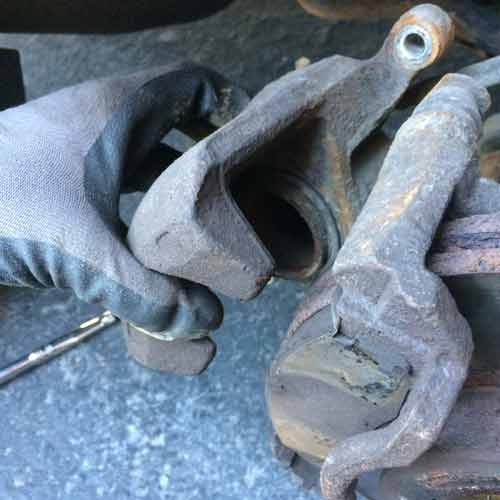
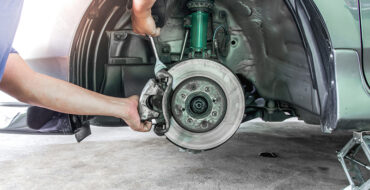
- Unbolt the brake calipers. Most vehicles have floating calipers, which require a caliper removal tool to change the brake pads. If yours are fixed, like on some performance cars, the caliper will be one solid piece.
- For floating calipers, remove the two caliper mounting bolts or guide pins. Note the location of any bushings or positioning pieces so they can be replaced in their original locations and keep any rubber or plastic covers. Lift the caliper off the rotor.
- For fixed brake calipers, remove the caliper mounting bolts only if the brake pads don’t come out the top of the caliper.
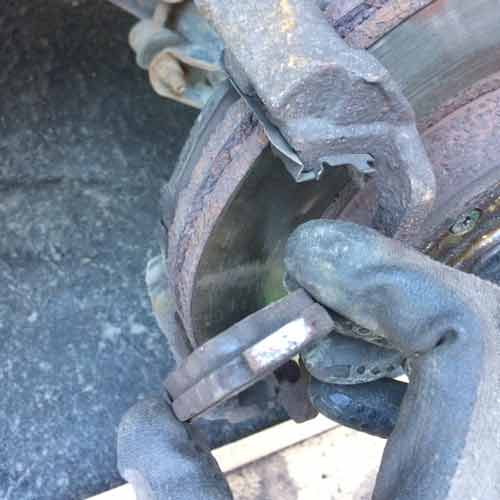
- Sometimes you can push the piston back enough to remove using a twisting motion. If not, you may need to pry slightly between the rotor and the inner brake pad for clearance.
- Note the position of any support springs, anti-rattle springs, or clips.
- Lift the caliper up and off.
REMOVE THE BRAKE PADS
- Push back the brake caliper piston.
- For fixed calipers, push against the old pads before you remove them. If the caliper must come off, push back one pad at a time until the pistons are seated. Careful use of a pry bar can help.
- For floating or sliding calipers, you must remove the caliper to push the piston back. Use a large C-clamp and push on the inboard pad. If your rear calipers have an integrated hand-operated parking brake, they will not push in. You will need to use a caliper tool to rotate and retract the piston.
- CAUTION: Be careful not to damage the pistons, bores, or dust boots when pushing the pistons. If you see damage like torn seals or scoring on the piston, you’ll need to replace or rebuild the calipers. If so, NAPA Auto Parts has the right brake hardware for the job.
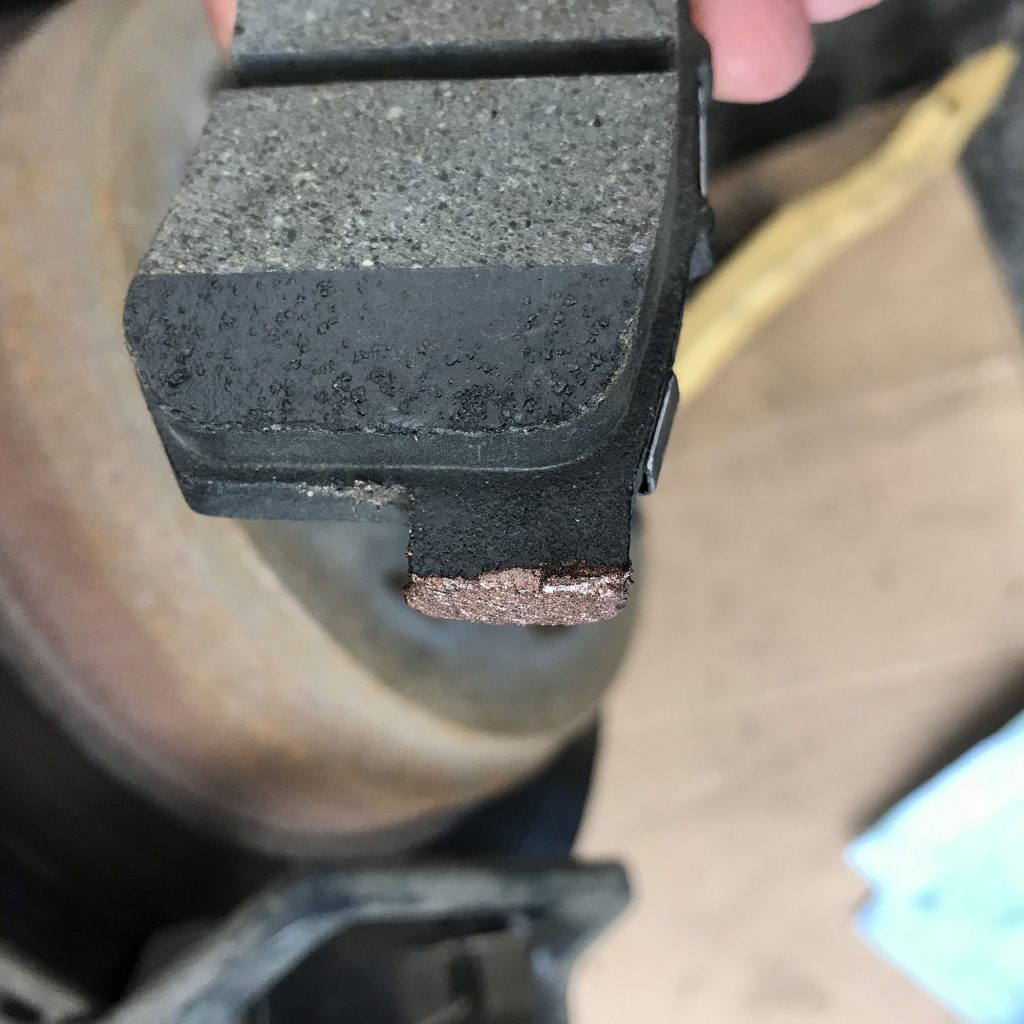
- Check for fluid leaks, rotor corrosion, or scoring and fix or replace those parts (replace seals/calipers, machine/replace rotors) before going any further. Don’t put new brake pads on rotors that are at the end of their life.
CLEAN AND LUBRICATE
- Remove any pins or retainers. Use brake cleaner and a nylon brush to remove dirt and corrosion. If sliding pins are scored or discoloured, replace them.
- Thoroughly clean the entire caliper and the mounting bracket with a wire brush. Use a rag to remove any dust or debris and clean with brake cleaner.
- Lubricate the caliper sliding pins using an appropriate brake lubricant.
- NOTE: Reusing rusty parts can lead to damage and noise, so always replace brake pad hardware. NAPA brakes come with hardware when required.
INSTALL NEW BRAKE PADS
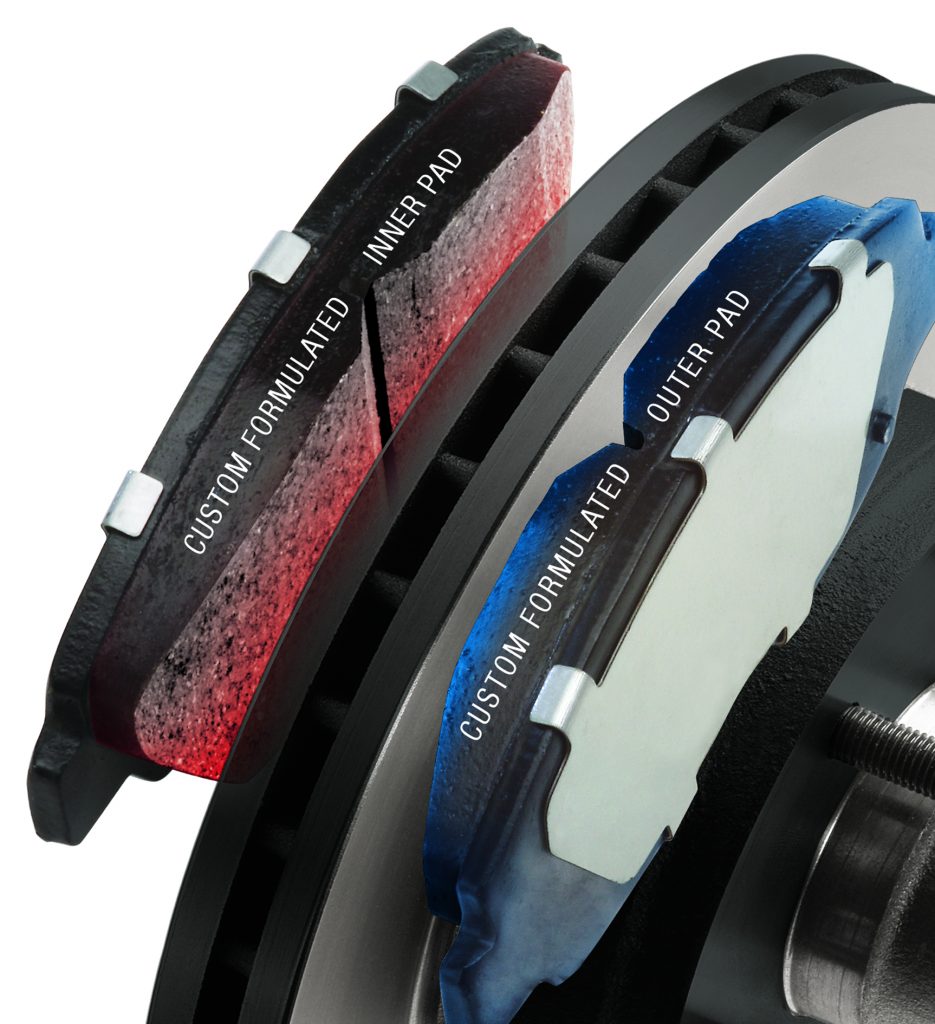
- Install the new brake pads in the caliper or anchor in the reverse order of their removal. Make sure all locating clips or anti-rattle springs are in position.
- Some outboard pads have “ears” that must be bent to fit tightly on the caliper. If necessary, bend the ears by tapping them carefully with a hammer, and use vise grips to press them into position. If the pad is loose on the caliper, it will squeal.
- Place a small amount of brake lubricant on the pad ears and where the caliper and piston touch the pads. This will help prevent brake noise. Do not get lubricant, grease, or oil on the pad surface.
- Place the caliper in position and reinstall any bolts, guide pins, support keys, or retainers. Some support keys must be hammered into position. Reinstall any retaining screws or pins. Make sure all bushings are in position. Use caution when replacing any steel springs.
- Tighten all bolts to factory specifications. Avoid replacing bolts or pins with standard hardware; only use bolts and/or pins designed specifically for your vehicle.
- Fill the master cylinder with clean brake fluid and bleed the brakes (if necessary).
- Replace the wheel, lower the vehicle, and torque the lug nuts to factory specification. Re-torque the wheels 100 km after any time they were removed.


Enthusiasm and desire can break through all difficulties
Thanks for your step by step guide. Is it possible to change pads on my home? I’m still getting confused.
Again, these are just a few of the numerous summer time occasions in the Southern Illinois region. Another factor about being a poker on-line professional is the status of the poker market.
Cool!!, caught our attention. we love your explanation, good Job you’ve done
with this. can we reblog?, i was referred here from a
viral news org, wont mind designing some great design with yah.
For now Keep it bouncing. Cheers
My web blog :: finger less gloves
This article is helpful for those who want to replace brake pad.
A couple of days ago, my brother told me he needed to find new brake pads for his car, but he hasn’t gotten any free time to find them. It’s great that you described which tools you’ll need to replace your brake pads, and since my brother’s too busy, I think it’d be wise if he looks for a specialist’s help. Thank you for the advice on brake pads and how to replace yours effectively. https://www.stopmasterbrakes.com.au/services