Did you know that checking your brake pads is simple? It can prevent expensive repairs and keep your drive smoother longer. In this article, learn all you need to know about how to check your brake pads and make it part of your regular maintenance schedule.
Are your brake pads worn out?
Brake parts breakdown
First, a quick refresher on the main components of a braking system.
Brake rotor disc: the rotating disc that the brake pads clamp onto in a brake system
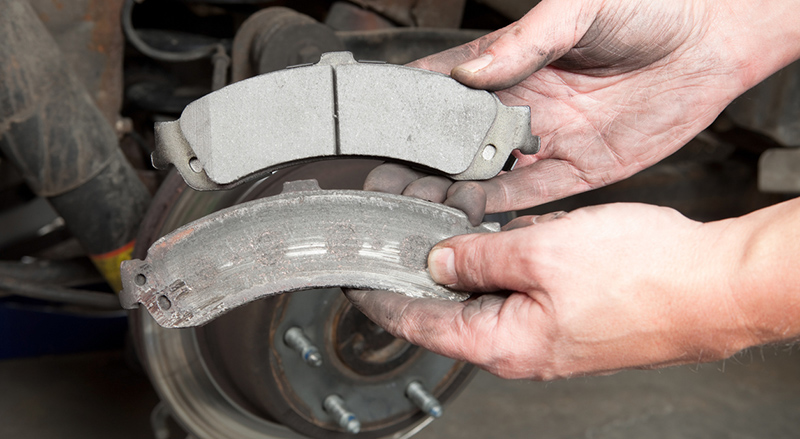
Brake pads: the friction material that presses against the rotor to decelerate motion in the vehicle
Brake caliper: houses the brake pads and pistons and applies pressure to the brake pads
Brake lines and hoses: carry brake fluid from the master cylinder to the calipers
Brake master cylinder: converts brake pedal pressure into hydraulic pressure for braking
Brake fluid: the hydraulic fluid that transfers force within the braking system
Why do brake pads wear out?
Having worn-out brake pads doesn’t mean you’re doing anything wrong. Brake pads wear down as they create friction against the brake rotors to slow down your vehicle. Driving habits, your vehicle type, and the material of your brake pads all factor into how fast this process happens.
Signs of worn-out brake pads
There are a few common indicators of worn-out brake pads. Recognizing these signals earlier can prevent further damage to your braking system.
- Reduced braking performance: If you’ve noticed that braking requires more force, or it takes longer than usual to stop, this may signal thinning brake pads.
- Screeching sounds: A high-pitched noise when applying the brakes also indicate that the brake pads have worn down. This uncomfortable noise occurs when friction acts upon the wear indicators.
- Vibrating or pulsing brake pedal: If you feel vibrations through the brake pedal (or even the steering wheel) when braking, this can mean uneven wear on brake pads or warped brake rotors.
How to check your brake pads
A visual inspection is the definitive way to diagnose worn-out brake pads. Regular inspection can maintain optimal braking performance in your vehicle. Here’s how to check your brake pads.
Step one: Begin by parking your vehicle on a flat surface (i.e., not your sloped driveway), shutting off the engine, and engaging the parking brake. Wear safety gear, including eye protection and gloves.
Step two: “Crack” the lug nuts on each wheel, but do not try to remove the wheels just yet.
Step three: Jack the car onto jack stands.
Step four: Remove the wheel by removing the lug nuts, using a “star” pattern as you do so.
Step five: Check the thickness of the friction material on the brake pads by locating the brake caliper and observing the brake pads positioned on either side of the brake rotors. If the thickness of the friction material is less than 6.4 mm, or shows signs of uneven wear, replacement is necessary.
Step six: Examine the brake rotors by looking for grooves, cracks, or discolouration on the surface of the rotor. This can affect braking efficiency.
Step seven: Once you’ve completed the inspection, reattach each wheel, lower the vehicle, and tighten the lug nuts securely.
When to replace brake pads
Consider replacement when the thickness of your brake pads is below the manufacturer’s recommended minimum. You’ll find this number in your owner’s manual along with information on routine brake maintenance intervals. We also recommend replacing brake pads if you experience any of the warning signs mentioned earlier.
Regularly monitoring and maintaining brake pads is crucial for safe driving. To ensure your vehicle’s braking system remains reliable and effective, stay vigilant and address worn-out brake pads promptly.
For assistance on how to replace your brake pads or what parts you should buy before you begin, visit your local NAPA Auto Parts store. Our friendly experts will be happy to assist you.