Winter can take a toll on your vehicle, including your windshield wipers. Now that the snow, ice, and sleet are melting, it’s time to inspect your wipers and replace them to prepare for spring. Before you start your spring car maintenance, learn how to inspect for winter damage and install a new set of windshield wipers in under 10 minutes.
Replacing Wipers for Spring: A Step-by-Step Guide

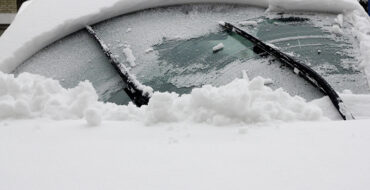
How Winter Damages Your Wiper Blades
Ice, snow, and extremely cold temperatures can cause the rubber to become brittle and crack. Road salt also corrodes blade material, making it far less effective at clearing water and debris from your windshield. Not to mention winter is a season where wipers are working overtime in poor conditions.
Once spring showers begin, the clear view of blossoming trees you’ve been dreaming of may be clouded by smeared morning dew your wipers can’t fully remove. As a rule of thumb, replace windshield wipers every 6 to 12 months to avoid poor visibility.
How to Inspect Your Wiper Blades
Start with a visual inspection to check for tears, cracks, or stiff rubber along the blade edge. Then look for bending in the frame or loose connections.
Even if your wipers appear to be in good condition, conduct a performance test by running them on a wet windshield to watch for streaking, skipping, or missed spots. Squeaky or chattering windshield wipers are also a sign they’re worn out.
You can try to troubleshoot the situation by cleaning the blades and windshield first with washer fluid and a microfibre cloth. If cleaning doesn’t improve their performance, it’s time to replace the blades, wiper arms, or both.
How to Choose the Right Wiper Blades for Spring
Winter wiper blades have an extra layer of synthetic rubber (usually silicone) to stay supple in the cold. Conventional blades include a rubber boot on the frame to help prevent joints from freezing.
Beam-style blades, on the other hand, rely on high-strength tensile steel and tension springs to maintain flexibility when it’s cold out.
Spring windshield wiper blades use a harder rubber that can withstand the heat. They’re also lighter, since they don’t need to remove snow and ice.
Finding the Right Size
Always check your vehicle owner’s manual or measure your current blades from end-to-end to see what size you need. Driver and passenger side wipers are usually different lengths, and don’t forget a rear wiper if your vehicle has one.
If you’re unsure which wiper blades are best for your vehicle, check out the NAPA Canada vehicle selector for a guaranteed fit or view our guide on wiper blade selection.
Step-by-Step: How to Replace Your Wiper Blades
Here’s an easy breakdown on how to properly swap to a new set of wipers for the spring.
What You'll Need
Before you begin, make sure you have a new set of wipers in the correct size and attachment type, a microfibre cloth to protect your windshield during installation, and a small screwdriver (just in case).
Step 1: Position the Wiper Arms
If possible, lift the arms off your windshield and extend them toward the front of your vehicle. If needed, you can also turn your wipers on and shut off the ignition once the blades are vertical. Place a folded microfibre towel on the windshield directly beneath the raised wiper arms. This acts as a protective buffer in case an arm accidentally snaps back against the glass.
Step 2: Remove the Old Blades
Next, locate the release tab where the blade meets the wiper arm. Press the tab and slide the old blade off the arm. If the mechanism is stuck, use the small screwdriver to carefully loosen the tab. Make sure the wiper arms remain away from the windshield.
Step 3: Install the New Blades
Read through the installation instructions included with your new blades. NAPA ExactFit® wipers come with vehicle-specific connectors already attached, eliminating the need to sort through adapters. If you’re using other blades, check whether adapters are needed. Once you confirm the connectors, align the connector with the wiper arm and slide the blade onto the arm until it clicks into place. Confirm it’s attached by tugging gently.
Step 4: Repeat and Test
Repeat this process with your passenger side and rear wipers. Once everything is connected, lower the arms onto the windshield and remove the microfibre cloth. Test out the new wipers by spraying the washer fluid and activating your wipers. You’re good to go if it wipes everything away without streaks or skips.
(Should you still experience problems, it may be time to replace the wiper arms. However, the wiper system’s motor and/or transmission may be malfunctioning, too.)
Spring Maintenance Bonus Tips
Along with swapping your windshield wipers, consider a few other maintenance tasks for streak-free spring driving.
- Switch your windshield washer fluid from a winter de-icer to a summer formula to target bug residue instead of ice.
- Inspect your windshield for chips or cracks from winter and make it a habit to change your wiper blades every fall and spring when you change the oil or rotate your tires.
- Set reminders every October and April to stay on track.
Spring wiper replacement is a quick and affordable DIY task that should be part of your annual post-winter vehicle maintenance. Clear visibility is essential for safe driving, and you can ensure it in under 10 minutes with a quick wiper swap.
For questions about choosing or installing the right wiper blades for your vehicle, visit your local NAPA Auto Parts storeto speak with one of our automotive experts. You can also browse our wide selection of wipers at www.NAPACanada.com.