Have you considered changing tires on your own? Or maybe tried and given up? Your choice of timing, location, tools, and technique is crucial to doing the job properly. In this article, we’ll offer some tips to help you improve your tire changing skills.
Tire Change Tips

When to Change Tires
The terrain you tend to drive on, typical weather conditions, provincial laws, and your driving habits will all impact when you need to change your tires.
If you live somewhere that gets a lot of snow, switch your tires from all-weather/all-season to winter tires in the fall. Make sure to do this before the first snowfall. Although winter tires are only mandatory in Quebec and British Columbia, we recommend them to anyone during the winter months.
(For more tips on prepping your car for winter, check out this post.)
You also need to replace tires before they wear down too much. Most tires will last three to five years, but where and how you drive can shorten or extend this lifespan.
For example, tires predominantly used on smooth, paved roads will last longer than those exposed to uneven dirt paths. Accelerating and decelerating smoothly, regularly checking tire pressure, and keeping your tires clean will also help keep them in shape as long as possible.
You can tell that your tires need replacing if you notice any of the following:
- Uneven tread wear
- Bulges, cracks, bubbles, or blisters
- Noises or vibrations when driving
Having two sets of tires is a common way to prolong the life of all your tires and avoid having to buy a new set as often.


Where to Change Tires
You can get your tires changed at your local garage, but here’s a hot tire change tip—you can save a lot of money by changing your tires on your own. Just one caveat: you have to know how to do so safely. The first step is picking a safe location.
Before you change a tire, select a flat, clear, and level surface. If you don’t have room in your garage, look for a smooth spot on your driveway. This is essential to both your safety and the stability of the vehicle on its jacking points. Move your vehicle into place and make sure the parking brake is on. Click here for full tire change instructions.
The Proper Equipment
Now that you’ve secured your workspace, you need to gather the right tools for the job. Don’t scrimp here. Your tire change tool kit should include the following:
- A jack and jack stands that can hold the weight of your vehicle
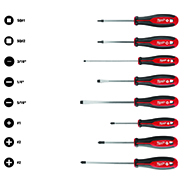
- A screwdriver set
- A socket that fits your wheel lug nuts
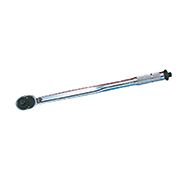
- A lug wrench or torque wrench
- A wheel lock key (if your tires have wheel locks)
- Penetrating oil for stubborn/rusted lug nuts


Technique Tips
Aside from the right equipment, you also need proper technique to perform a perfect tire change from home. Follow these tips:
- Use a tire marker to indicate each tire’s position (FL = front left, RR = rear right, etc.).
- Change one wheel at a time.
- Loosen the lug nuts before lifting.
- Push against the tire with your body weight instead of pulling with your back.
- Inspect the brakes for surface rust or damage while the wheel is bare.
- Check the tire pressure after securing new tires.
- Go for a short drive after changing the tires, and then torque the wheels again.
Time for a Replacement?
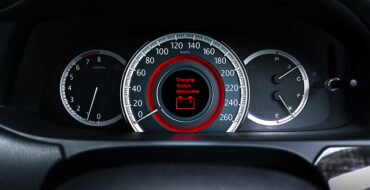
If you notice that your tires are making weird noises or vibrating when you drive, you may need a wheel alignment or tire rotation. If the tires are visibly damaged, however, you’ll need to repair or replace them.
For more DIY guides and automotive tips, check out our blog. If you have questions before you get started, ask our experts at your local NAPA Auto Parts.